
A greenhouse is more than just a shelter for plants, it’s a working environment where thoughtful interior design directly impacts growth rates, workflow efficiency, and longevity of the structure itself. Unlike traditional indoor spaces, greenhouse interiors must balance aesthetic appeal with intense humidity, temperature swings, UV exposure, and constant moisture. The right layout, materials, and systems can turn a basic glass box into a year-round productive space that’s as enjoyable to work in as it is functional. This guide walks through the core elements of greenhouse interior design, from structural planning to finishing touches, with practical advice grounded in real-world constraints.
Key Takeaways
- Greenhouse interior design must balance aesthetics with functional requirements like high humidity (60–90%), temperature extremes, and UV exposure using moisture-resistant materials such as cedar, galvanized steel, and exterior-grade finishes.
- An efficient greenhouse layout positions frequently used items near the entrance, places taller plants along the north wall, and maintains at least 24–36 inches of aisle width to support workflow and prevent dead zones that inhibit plant growth.
- Concrete flooring with a gentle slope toward drainage points, combined with breathable concrete sealer, provides durable and easy-to-clean surfaces for year-round greenhouse operations.
- Ventilation systems with total vent area equal to 15–20% of floor area, along with thermostatically controlled openers and shade cloth (30–50% factor), are essential to prevent overheating and fungal disease.
- Benches at 30–36 inches height with tiered wall shelving, hanging baskets, and proper storage solutions maximize workspace efficiency while minimizing back strain and maintaining airflow beneath pots.
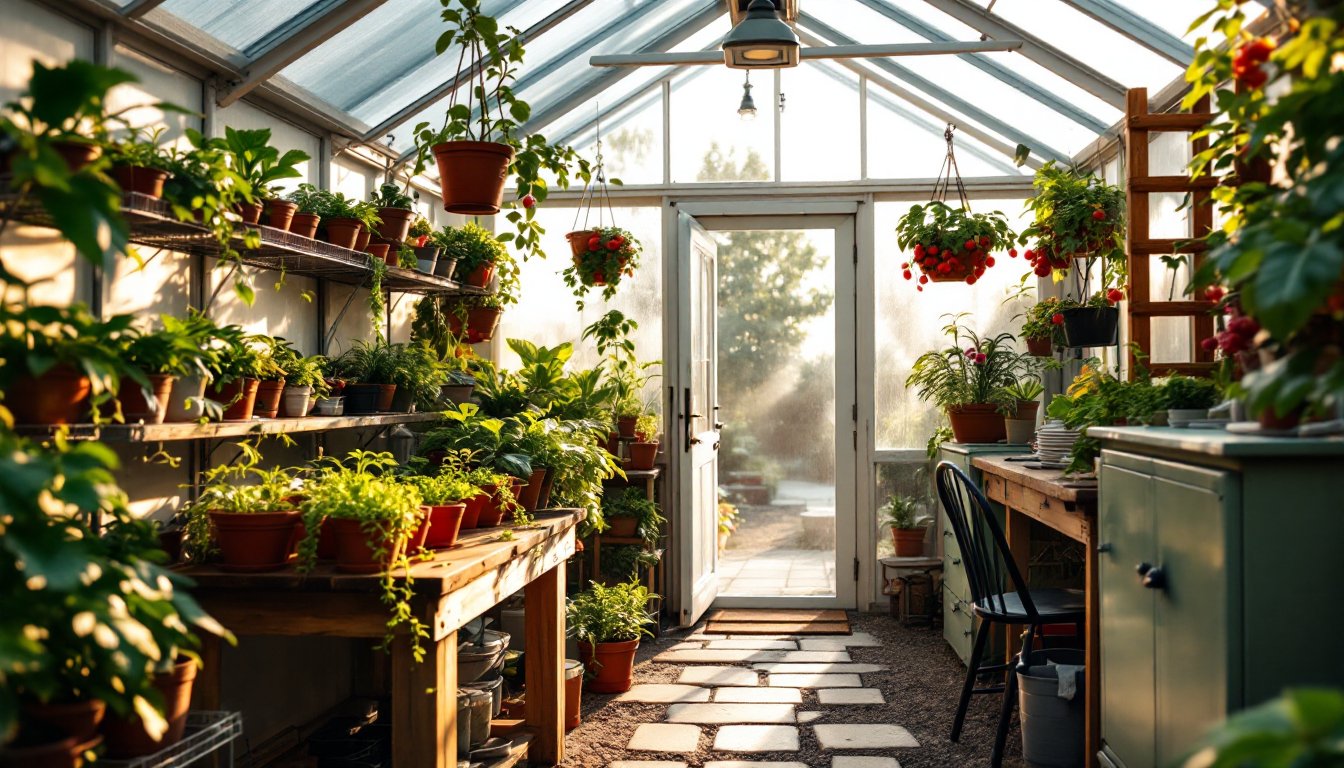
- Personal touches like UV-stable paint colors, LED task lighting, and plant arrangement by color or texture enhance the greenhouse workspace without compromising its primary function as a productive growing environment.
What Makes Greenhouse Interior Design Unique?
Greenhouse design operates under a different set of rules than residential or commercial interiors. Every decision must account for high humidity (often 60–90%), temperature extremes (from below freezing to over 100°F depending on climate and season), and constant exposure to UV radiation that degrades standard materials quickly.
Unlike a living room or workshop, greenhouses require materials that resist mold, mildew, rust, and rot. Wood needs to be treated or naturally rot-resistant (cedar, redwood, or pressure-treated lumber rated for ground contact). Metals should be galvanized, stainless steel, or powder-coated aluminum. Paint and finishes must be exterior-grade and UV-stable.
Functionality trumps aesthetics, but the two aren’t mutually exclusive. The layout must support plant care workflows, watering, transplanting, pruning, pest management, while maintaining adequate airflow and light penetration. A poorly planned interior creates dead zones where plants languish or mold thrives, no matter how attractive the shelving looks.
Another key difference: drainage. Interior floors must shed water efficiently without creating slip hazards or pooling that invites pests and disease. This isn’t a space where spills are occasional, water is a daily, deliberate part of operations.
Essential Layout Planning for Your Greenhouse
Start by mapping workflow and access. The most efficient greenhouse layouts position frequently used items, potting soil, tools, watering cans, near the entrance. Taller plants or trellised crops go along the north wall (in the Northern Hemisphere) to avoid shading shorter plants. Benches and shelving should allow at least 24 inches of aisle width for comfortable movement: 30–36 inches is better if using a wheelbarrow or cart.
Consider the path of the sun. Even in a fully glazed structure, some areas receive more direct light than others. Reserve prime southern exposure for high-light crops (tomatoes, peppers, citrus) and use shadier corners for ferns, orchids, or storage.
Zone the space by task and microclimate. Many growers dedicate one area to seedling propagation (which needs high humidity and warmth), another to mature plants, and a third to potting and maintenance. Physical dividers aren’t always necessary, simple changes in bench height or the addition of a shade cloth can create distinct microclimates.
If the greenhouse is larger than 10×12 feet, consider incorporating a central aisle with benches on either side. For smaller structures, perimeter shelving with a central work area maximizes usable surface without crowding. Always leave space for future growth, literally and figuratively. A greenhouse that’s packed tight on day one becomes a frustrating obstacle course by season two.
Choosing the Right Materials and Finishes
Material selection in a greenhouse is a long-term investment against moisture and UV damage. Aluminum framing is lightweight, rust-proof, and requires no maintenance, though it conducts heat and cold more readily than wood. Wood frames (especially cedar or redwood) offer better insulation and a classic aesthetic but demand periodic sealing or staining with exterior-grade, water-based products.
For benches and shelving, rot-resistant wood, galvanized steel, or heavy-duty plastic are the go-to options. Avoid particleboard, MDF, or standard plywood, they’ll swell and disintegrate within a season. If using treated lumber, confirm it’s safe for food crops: older CCA-treated wood contains arsenic and shouldn’t contact edible plants.
Any painted surfaces should use exterior latex or acrylic paint with mildew inhibitors. Flat or satin finishes are easier to clean than high-gloss. Skip oil-based paints, they yellow under UV and off-gas in heat.
Flooring Options for Greenhouse Interiors
Flooring must drain well, resist rot, and provide stable footing. Here are the most common options:
- Gravel or crushed stone: Excellent drainage, inexpensive, easy to install. Layer 2–3 inches over landscape fabric to suppress weeds. Downside: harder to sweep, and pots can tip on uneven surfaces.
- Concrete: Durable, easy to clean, and accepts floor drains. Pour with a slight slope (1–2% grade) toward a drain or door. Seal with a breathable concrete sealer to reduce dusting and staining.
- Paver bricks or flagstone: Good drainage if set on a sand base with wide joints. More expensive and labor-intensive than gravel but easier to walk on and aesthetically appealing.
- Dirt or compacted soil: Low-cost and traditional, but prone to mud, weeds, and pest harboring. Not recommended for serious year-round use.
Whichever flooring is chosen, ensure it slopes gently away from structural supports and allows water to exit the greenhouse rather than pool beneath benches.
Creating Climate Control and Ventilation Systems
Ventilation is non-negotiable. Even in winter, a sealed greenhouse can overheat on a sunny day, stressing plants and encouraging fungal disease. Plan for roof vents or gable vents at the peak to exhaust hot air, and side vents or louvered panels low on the walls to draw in cooler air. A general rule: total vent area should equal at least 15–20% of the floor area.
For automated control, consider thermostatically controlled vent openers (available as solar-powered or wax-cylinder models) or exhaust fans wired to a thermostat. A 12-inch exhaust fan can move enough air for a 10×12-foot greenhouse: larger structures may need multiple fans or a high-CFM model.
Shade cloth reduces heat gain in summer. Mount it on the exterior (more effective) or interior (easier to install and remove). Choose a 30–50% shade factor for most crops: high-light plants may need less, shade lovers more.
Heating is often simpler than cooling. Electric or propane heaters work well for small to mid-sized greenhouses. Size the heater based on the cubic footage, desired temperature lift, and local climate. In colder zones, consider insulating the north wall or adding bubble wrap insulation to glazing panels in winter, it cuts heat loss significantly without blocking too much light.
Humidity control usually means balancing ventilation with watering practices. If humidity climbs too high, increase airflow or reduce watering frequency. If it’s too low (common in heated greenhouses in winter), add humidity trays, a misting system, or simply group plants closer together.
Shelving, Benches, and Storage Solutions
Benches should sit at a comfortable working height, typically 30–36 inches, to reduce back strain during potting and transplanting. Build frames from 2×4 lumber (actual dimensions 1.5×3.5 inches) and top with galvanized wire mesh, slatted wood, or expanded metal to allow drainage and airflow beneath pots.
For maximum space efficiency, install tiered shelving along walls. Use powder-coated steel wire racks (the kind sold for pantries or garages) or build custom shelves from treated 1×6 or 1×8 boards on galvanized brackets. Space shelves 12–18 inches apart vertically, adjusting based on plant height.
Hanging baskets and overhead racks take advantage of vertical space without consuming floor area. Install eye bolts or ceiling tracks rated for the combined weight of pots, soil, and water, saturated hanging baskets can weigh 20+ pounds each.
Storage is often an afterthought, but keeping tools, fertilizers, and supplies organized prevents clutter that blocks light and airflow. Wall-mounted pegboards, magnetic tool strips, and weatherproof bins work well. Store bagged soil and amendments off the floor on pallets or shelves to prevent moisture wicking and pest entry. Keep a small potting bench or fold-down work surface near the entrance for quick tasks without trekking to the main work area.
Styling Your Greenhouse: Décor and Personal Touches
Function comes first, but there’s no reason a greenhouse can’t also be an inviting space. Simple touches add character without compromising performance.
Color can be introduced through pots, tool handles, or painted accents on benches and doors. Stick with UV-stable outdoor paints and powders. Bright colors can boost mood during long winter work sessions, while earth tones blend with the greenery.
Signage and labels serve a practical purpose, tracking plant varieties, watering schedules, or fertilization dates, but can also be decorative. Chalkboard paint on wooden stakes, engraved metal tags, or hand-painted ceramic markers all work.
If the greenhouse doubles as a retreat or entertaining space, add a small bistro set, weatherproof cushions, or a fold-down desk for journaling or planning. Just ensure furniture doesn’t block pathways or shade plants.
Lighting extends usability into evening hours. String LED café lights (outdoor-rated, obviously) overhead, or install waterproof task lights above potting benches. Grow lights are functional but can also create ambiance if chosen in warmer color temperatures (3000–4000K).
Finally, embrace the living décor. Healthy, well-arranged plants are the best styling element a greenhouse can have. Group plants by color, texture, or height. Use trailing vines to soften hard edges. Let the space showcase what it’s built for.